
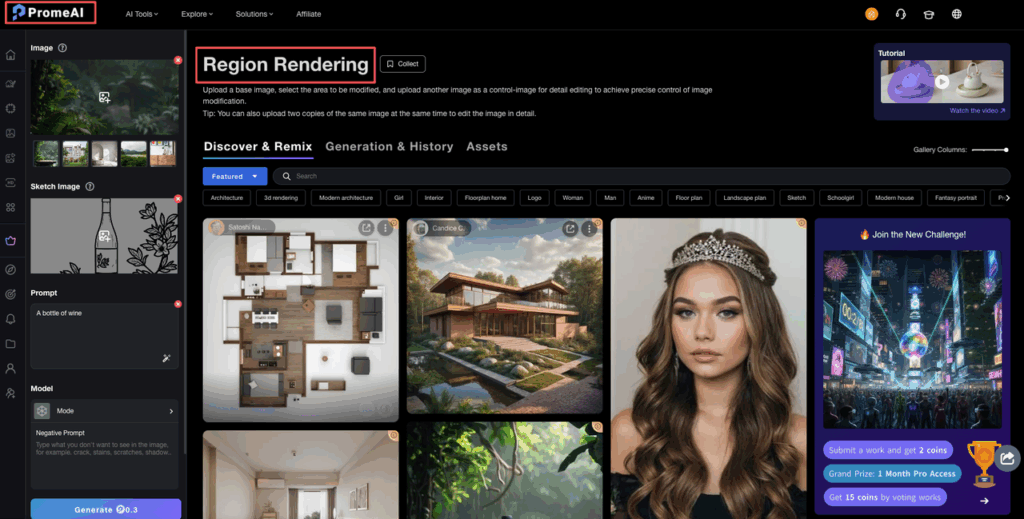
Yesterday, I turned a bland white sofa into deep moss velvet in under 30 seconds—and the rug, wall art, and lighting didn’t budge an inch. That was the moment PromeAI region rendering went from a cool novelty to an essential part of my daily toolkit. If you are looking for precision selective editing, you need to stop re-rendering full scenes.
I am Millie. I’m going to walk you through the exact mask strategies and feathering settings I use to swap materials and lighting while keeping the rest of the composition frozen in time.
Region Rendering vs Full Render
The big mental shift: with region rendering, we’re asking the AI to touch only a selected area and keep everything else frozen. With a full render, we’re basically telling it, “Go wild across the whole frame.”
When to use each
Here’s how we decide in real projects:
We use full render when:
- We’re exploring early concepts.
- Layout, style, and mood are still loose.
- We want new compositions or big changes (new camera angle, new decor, etc.).
Think: early moodboards, pitch decks, first-pass ideas.
We use region rendering selective edit when:
- We must keep background and composition exactly as-is.
- We’re in revision mode with clients.
- We’re swapping materials, props, or light inside a final shot.
Examples we’ve tested in PromeAI:
- Changing a product’s finish from brushed aluminum to matte black without touching the studio setup.
- Updating a lobby floor from glossy marble to warm oak while keeping the reflections and walls.
- Adjusting light temperature on a single lamp instead of re-lighting the whole interior.
PromeAI’s docs call this Region Rendering, but in our heads we treat it like a smart patch tool with a brain. The trick is in how we set up the mask workflow, which is where most of the precision editing wins happen.
Mask Strategy for Best Results
Bad mask, bad result. Clean mask, chef’s kiss.
Over the past few weeks, our hit rate went way up once we got more intentional with selections.
Selection techniques
Here’s the approach we’ve seen work best across interiors, product shots, and marketing visuals:
- Mask whole objects, not tiny fragments If we’re changing a chair fabric, we grab the entire chair, even if we’re only editing the seat. Small jagged selections make the AI guess too much.
- Follow natural boundaries We trace along edges where materials actually change: wall–ceiling lines, table–floor edges, frame borders, etc. This gives the model clear cues about where to stop.
- Leave a tiny safety margin We extend the mask 1–3 px past the object edge. This helps avoid tiny slivers of old material peeking through after the selective render.
- Avoid ultra-thin strips Very narrow masks (like 1–2 px lines) tend to produce crunchy artifacts. For those, we either:
- Mask a slightly bigger block around the line, or
- Fix it later with a small inpainting pass.
We treat selection like cropping a photo: cleaner lines give the AI a cleaner job.
Feathering edges
Feathering is where PromeAI’s localized edit AI goes from “good” to “really hard to spot.”
Our go-to settings:
- Soft interiors, fabrics, foliage: light feathering (2–5 px)
- Hard edges (furniture, product shells): minimal feathering (0–2 px)
- Blurry / shallow depth-of-field shots: more feathering (5–10 px) so the new pixels blend into the bokeh
Why it matters: Feathering works like blending paint colors on the border. No feather = clear cut line. Gentle feather = the new material slides into the old background.
We run quick A/B tests:
- First pass: low feather
- Second pass: higher feather
Then we compare at 100% zoom. It takes an extra minute, but the end result feels way more “shot in camera” and less “patched in post.”
There’s a great visual explainer in the PromeAI Academy tutorial that echoes exactly what we’ve seen in practice. You can also watch this detailed video walkthrough for step-by-step demonstrations.
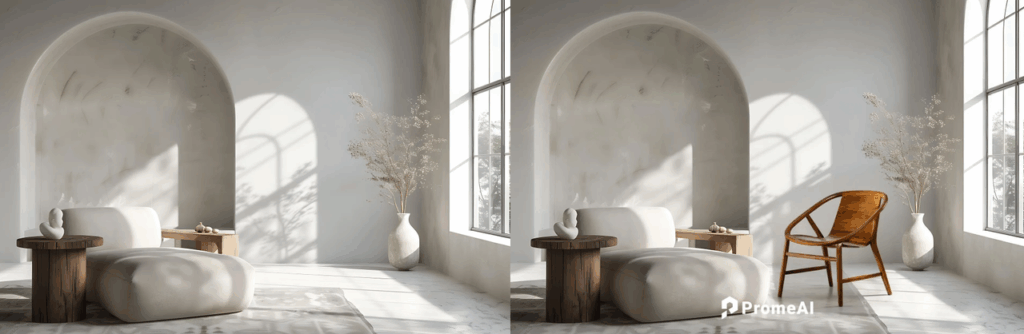
Material Swap Example
Let’s do a real project-style run: swapping a conference table from cold white laminate to rich walnut, while we keep background lighting, chairs, and reflections.
Step-by-step walkthrough
Scenario: marketing shot for a workspace brand. Client asks: “Same image, but can the table look more premium wood?” We don’t want a full rerun: we want a selective render.
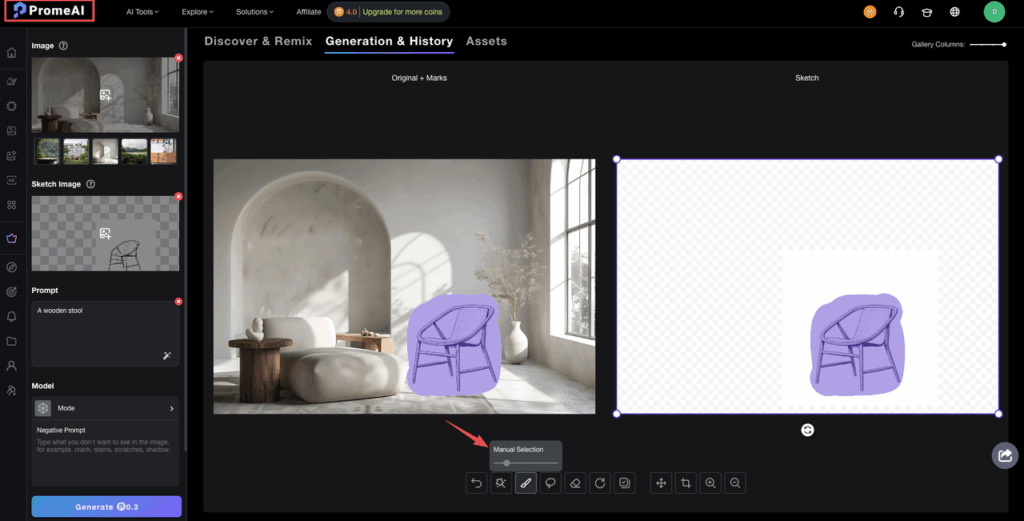
- Load the base image in PromeAI Open your final render or product photo. This can be from any 3D tool or photo shoot.
- Activate Region Rendering Switch to Region Rendering mode so edits are restricted to a mask.
- Create the mask
- Select the entire tabletop surface.
- Include a thin margin around the edge (1–3 px) so the wood wraps naturally over corners.
- Avoid selecting chairs, laptops, or hands.
- Set the model + strength
- Model: whatever you normally use in PromeAI for photoreal interiors.
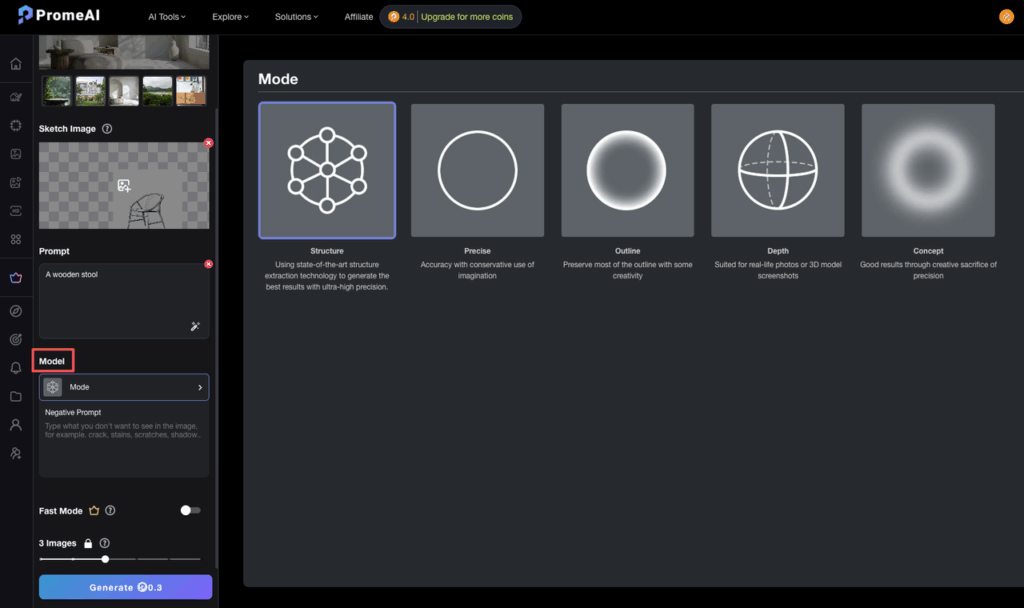
- Strength: we stay in the 30–50% range for material swaps. High enough to change texture, low enough to keep reflections and perspective.
- Prompt it clearly Here’s a prompt that worked well for us:
- Prompt: wooden conference table in rich medium walnut, subtle natural grain, semi-matte finish, realistic reflections, same angle, same lighting
We keep extra constraints out of the prompt because PromeAI’s consistency rendering already tries to preserve the scene.
- Run 3–4 variations We generate multiple passes and pick the one that matches existing reflections and chair shadows best.
- Micro-fix with inpainting (optional) If a laptop edge or coffee mug lip gets slightly warped:
- Mask that tiny area.
- Use Inpainting with a simple prompt like:
- Prompt: restore clean laptop edge, same color and lighting
Cheat sheet to copy:
- Area: tabletop only
- Feather: 2–4 px
- Strength: 30–50%
- Prompt: rich medium walnut wood, subtle grain, semi-matte, keep perspective and reflections
We’ve used the same pattern to:
- Switch sneaker uppers from mesh to leather.
- Change a product housing from gloss white to textured black.
- Turn a plain wall into limewash plaster while keeping the artwork.
The mask workflow is almost identical every time.
Lighting-Only Example
Now the fun part: changing the time of day without restaging the whole scene.
We used this on an architectural lobby shot: same camera, same materials, two moods for the client deck, day and “after-hours glow.”
Change time of day
The trick is to keep edits hyper-local so the AI doesn’t repaint the entire space.
- Decide the light sources We ask: where would the change be most visible?
- Window areas / skylights
- Ceiling fixtures
- Neon / accent strips
We mask these zones separately, running multiple region renders instead of one massive mask.
- Day-to-night example
For windows:
- Mask: window panes and the immediate glow on the floor.
- Feather: 5–10 px (soft gradients help).
- Prompt: nighttime exterior, dark blue sky, subtle city lights, interior stays the same
For interior fixtures:
- Mask: just the actual bulbs / strips and the halo around them.
- Feather: 3–6 px.
- Prompt: warm indoor lighting, cozy golden glow, increased brightness, keep fixtures design
- Daylight shift (morning to golden hour)
We’ve had good results with this combo:
- Window mask prompt: late afternoon golden hour, warm soft sunlight, long shadows, same building exterior
- Strength: 20–35% so we keep the original composition but gently shift the mood.
Again, think of prompting like seasoning food: small, targeted changes instead of dumping the whole spice rack.
For extra control, we sometimes:
- Do a first pass on windows only.
- Then a second pass on floor reflections using a tighter mask.
That way, PromeAI’s precision editing stays believable, especially for clients who know lighting physics a little too well.
Failure Fixes
Region rendering is powerful, but it’s not flawless. We see the same two issues pop up over and over.
Edge bleeding
You’ll know this one instantly: the new material “leaks” outside the mask. Maybe the walnut creeps onto a laptop edge, or a light glow spills onto a frame.
How we fix it:
- Tighten the mask slightly Pull the selection back inside the object edge instead of past it.
- Lower strength Drop from 50–60% down to 25–40% so PromeAI respects the original pixels more.
- Use a second, micro-mask Mask the contaminated area (like the laptop corner) and run a tiny inpainting pass to restore it.
If it keeps happening, we simplify the prompt. The more we push style shifts, the more the borders get confused.
Style mismatch
This one shows up when the edited area looks like it came from a different shoot:
- Different sharpness or grain
- Different color grading
- Overly stylized texture inside an otherwise clean, corporate shot
Our go-tos:
- Match style in the prompt We add cues like:
- same camera angle and sharpness
- same color grading
- studio product photo, neutral lighting
- Use PromeAI’s consistency rendering mindset We keep prompts short and aligned with the original image type, just like their docs suggest.
- Tone down the ask Huge jumps (studio packshot → grungy cinematic) in a tiny mask almost always look off. We do:
- Small style shifts with region rendering.
- Big style rebrands with a full render.
We’ve walked through the exact masking and feathering settings that save us hours on revisions. Now, we invite you to open your latest project in PromeAI and test these techniques for yourself to see if they fit your workflow.
If you’ve read this far, you’re probably juggling tight deadlines and picky stakeholders like we are.
So here’s our question: where do you usually get stuck in this mask workflow, selection, prompts, or fixing edge artifacts? That’s the part we’d love to stress-test next.
For more advanced techniques and features, explore PromeAI’s AI tools to discover additional capabilities that can streamline your workflow.
Frequently Asked Questions
What is PromeAI region rendering selective edit and how does it work?
PromeAI’s region rendering selective edit lets you apply AI changes only to a masked area while keeping the rest of the image frozen. Instead of re-rendering the whole frame, you select a region, set strength and prompts, and PromeAI regenerates just that portion with high consistency.
When should I use region rendering instead of a full render in PromeAI?
Use a full render when exploring early concepts, new compositions, or big layout changes. Use region rendering selective edit when you must keep the background and composition exactly the same, such as client revisions, material swaps, prop changes, or localized lighting tweaks in a final shot.
How do I create the best masks for PromeAI’s localized edit AI?
For clean results, mask whole objects instead of small fragments, follow natural material boundaries, and extend the mask 1–3 pixels beyond edges. Avoid ultra-thin strips and instead select slightly larger blocks. Cleaner selections give PromeAI clearer context and reduce artifacts and guesswork at the borders.
What feathering settings work best for region rendering selective edits?
Light feathering (2–5 px) works well for soft interiors, fabrics, and foliage. Use minimal feathering (0–2 px) on hard edges like furniture and products. For shallow depth-of-field or blurry shots, increase feathering to 5–10 px so new pixels blend smoothly into existing bokeh and gradients.
How can I fix edge bleeding or style mismatch after a region render in PromeAI?
For edge bleeding, tighten the mask inside the object edge, lower the strength to around 25–40%, or use a micro-mask with inpainting to restore details. For style mismatch, simplify prompts, reference same sharpness and grading, and avoid huge style jumps within tiny masks—use full renders for major rebrands.
Recommended Reads
Leave a Reply