Stop begging for reshoots or wasting hours cloning pixels in Photoshop. With the right workflow, PromeAI Erase & Replace tools can clean up architecture shots and product photos in a single pass. This isn’t just another basic tutorial; it’s a professional inpainting guide derived from real client work.
Whether you need to vanish a power line or swap a sofa style for a mood board, I’ll show you the exact masking rules and prompt recipes we use to get believable edits that don’t scream “AI generated.”
When to Use Erase vs Region Edit

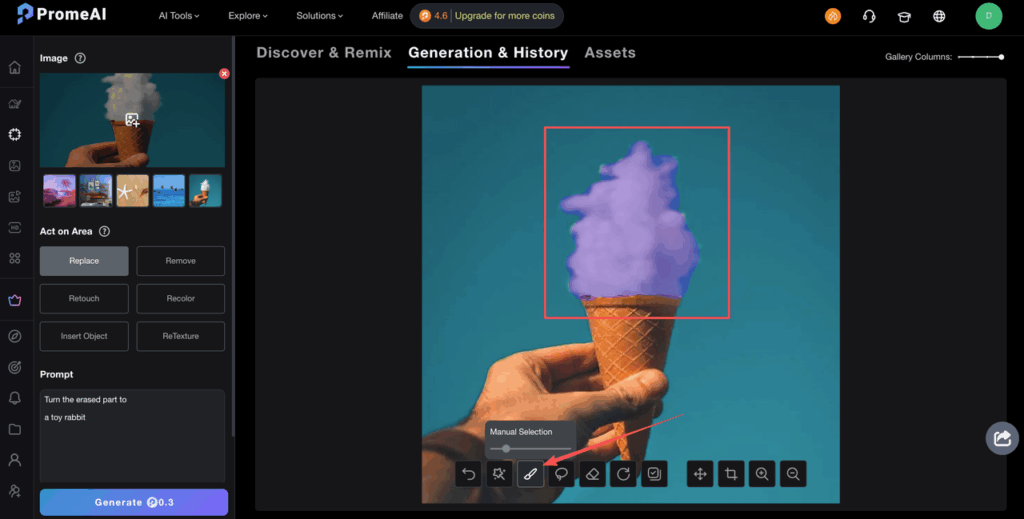
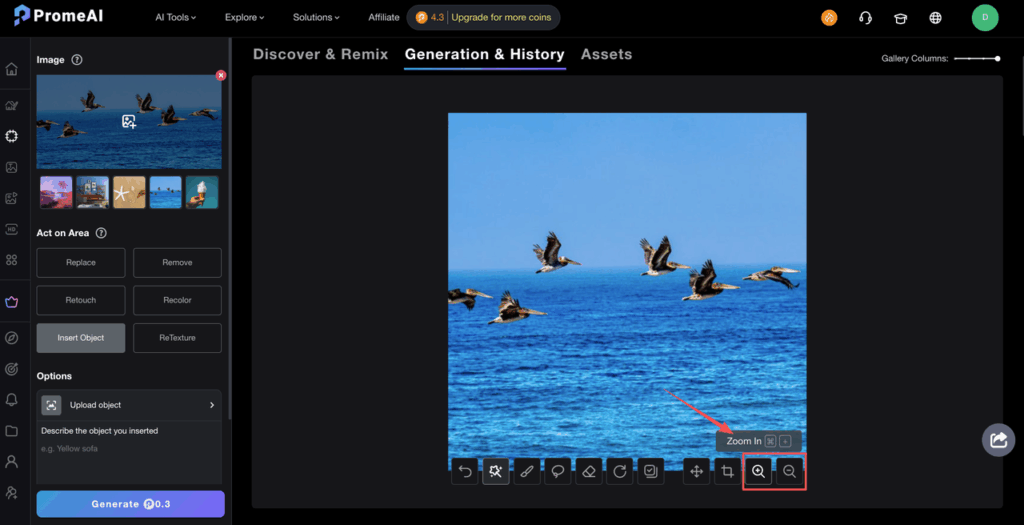
The two big buttons you’ll live in are Erase and Region Edit (Region Rendering) in PromeAI.
Think of them like this:
- Erase = “Make this thing vanish and blend the gap.”
- Region Edit / Replace = “Swap this thing for a better thing in the same spot.”
We lean on Erase for cleanup:
- Removing power lines, trash, people in the background
- Getting rid of logos or watermarks (within your legal rights, obviously)
- Clearing props you didn’t notice on set
We use Region Edit / Replace for design changes:
- Swapping a sofa in an interior render for a different style
- Changing product labels or flavors in a pack shot
- Replacing sky, floor finish, or wall art to test variations
According to PromeAI’s official documentation on inpainting, both tools share the same underlying engine. The main difference is how much control your prompt has over the result.
Decision criteria
Here’s the rule of thumb we use:
Use Erase when you:
- Want the background to look like it was never touched
- Need fast object removal AI with minimal prompting
- Are fixing clutter, wires, signs, small mistakes
Use Region Edit / Replace when you:
- Already know what should be in that spot
- Are doing creative changes (new furniture, different product, alternate material)
- Need consistency across multiple shots (same object, different angles)
If you’re unsure, start with Erase, look at the blend, then redo the same mask as Region Edit with a clear prompt. Compare both. After a few tries you’ll start to “feel” which is right in under five seconds.
Masking Rules for Clean Results

The mask is where most inpainting wins or fails. PromeAI is pretty forgiving, but a messy mask will give you halos, weird edges, or warped geometry.
Here’s how we paint masks now after a week of painful experiments.
Brush size tips
We treat brush size like brush size in Photoshop:
- Small brush (5–15px on standard 1080p images) Great for: cables, edges of furniture, thin window frames Why: You keep structure intact while removing just the target object.
- Medium brush (20–60px) Great for: people, mid-sized objects, logos Why: Big enough to cover the thing, small enough to keep background hints.
- Large brush (80px+) Great for: changing whole zones (sky, floor area, a big sign) Warning: You’ll get more variation, which is fun creatively but risky for strict brand work.
Simple rule: The more context you leave around the mask, the smarter the fill or replacement will look. This lines up with general Stable Diffusion inpainting best practices.
Edge handling
Edges are where artifacts love to hide.
We’ve found three habits that save us a lot of re-renders:
- Overlap the object slightly Don’t trace exactly on the edge. Eat into the object by a few pixels so there’s zero leftover fringe.
- Feather with a second pass After masking, lightly “kiss” the edge with a softer, slightly larger brush. It’s like smudging pencil lines so they don’t look cut out.
- Avoid hard corners where possible Round off corners of your mask. Sharp 90° angles in the mask can produce visible seams or odd noise.
We also keep an eye on important geometry, stair edges, table legs, window mullions. If those get even slightly bent by the inpainting tool, we immediately redo the mask to give PromeAI more context rather than trying to patch it later.
Prompt Recipes for Inpainting
Once the mask is clean, the prompt does the heavy lifting. Think of prompting like seasoning: a pinch of the right words beats a long, overwritten paragraph.
We usually keep it to one main subject, style hints, and lighting.
Background fill
This is where erase shines. You take something out and want the gap to feel boring, in a good way.
Goal: Remove a watermark on a white product photo and keep it crisp.
- Tool: Erase
- Mask: Just the watermark area, plus a tiny margin
- Prompt: often blank or super minimal
If the auto-fill struggles, we nudge it with:
Prompt: clean white studio background, soft shadow, minimal texture
For interior or architectural shots, we use:
Prompt: neutral plaster wall, soft indirect daylight, subtle texture, no picture frames
or
Prompt: paved sidewalk, natural concrete, consistent pattern, no cracks
These short prompts help PromeAI’s inpainting generation tool “guess” the right kind of background fill without wildly redesigning the scene.
Object replacement
This is where Region Edit / Replace gets fun.
Example 1 – Product designers: Swap a matte can for a glossy bottle.
- Tool: Region Edit
- Mask: Just the can, keep shadows and reflections unmasked as much as possible
- Prompt:
Prompt: single clear glass bottle, minimal label, soft reflections, studio lighting, placed on table
Run 3–4 variations, pick the one with the best perspective.
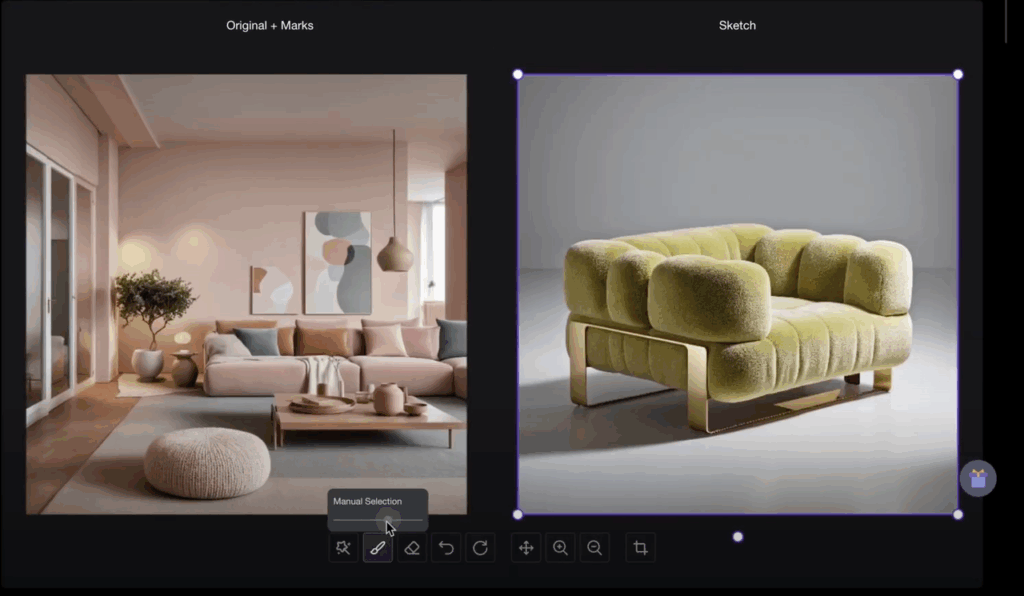
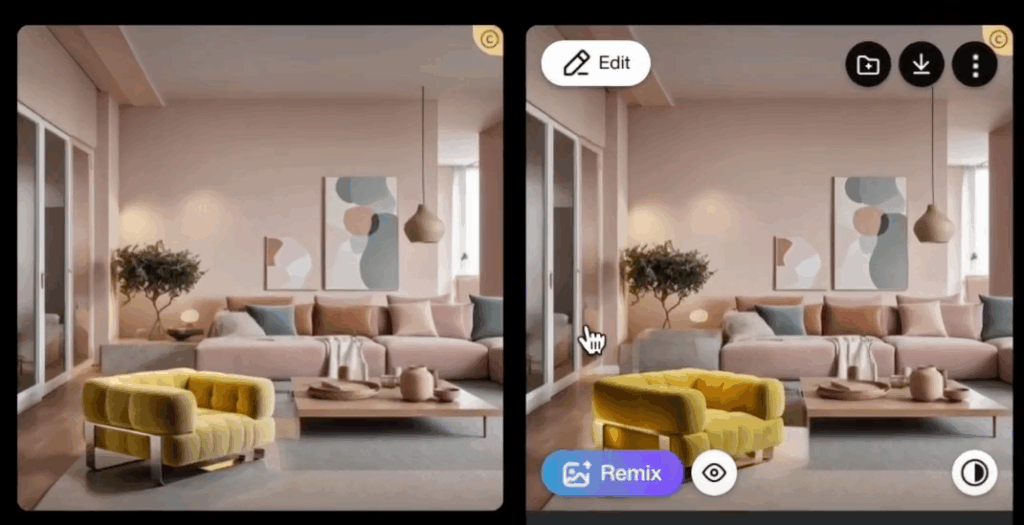
Example 2 – Architects / interior designers: Change a gray sofa to a warm fabric armchair.
- Tool: Region Edit
- Mask: Sofa body, keep floor, wall, and close shadows intact
- Prompt:
Prompt: modern fabric armchair, warm beige, simple design, same angle, soft daylight
We’ve found that adding same angle or same perspective helps keep geometry consistent, which matches what advanced inpainting techniques also recommend.
If PromeAI over-stylizes, we simplify the prompt. Fewer adjectives, more nouns.
Artifact Fixes
Even with good masks and prompts, we still get the usual suspects: halos, color shifts, and soft mushy areas. Here’s how we fix them without starting over.
Halo removal
Halos usually appear around sharp objects, like a table edge where we erased clutter.
What works for us:
- Micro-mask the halo only New tiny mask that hugs just the bright/dark fringe, nothing else.
- Use Erase with a neutral promptPrompt: continue wood table texture, natural grain, same lighting
- Drop strength slightly If PromeAI lets you adjust strength, we pull it down a bit so it respects the existing pixels more.
We repeat this in small steps instead of one giant redo. It’s faster and keeps structure intact.
Color matching
Color mismatch is the giveaway that an area was edited. Maybe the new wall patch is warmer, or the sky is more saturated.
We do three things:
- Reference-check: Eyeball nearby areas and describe them in the prompt: cool daylight, warm tungsten, overcast sky, low contrast, etc.
- Re-inpaint with color notes:Prompt: same concrete texture, low contrast, cool daylight, slightly desaturated
- Manual polish: If it’s still off, we’ll do a fast HSL or Curves tweak in Photoshop/Figma. Inpainting gets us 90% there: quick grading finishes it.
Industry guides like this practical inpainting example from Microsoft’s data science team also call this out: the model tends to push contrast and saturation, so adding neutral colors or natural lighting often reins it back in.
One extra trick for product shots: add consistent brand color to prompts when filling artifacts around logos or packaging. Weird little fill artifacts disappear faster if the model “knows” which color family it should stick to.
QA Checklist Before Export
Before we send anything to a client, we zoom in and run through the same quick checklist. It’s boring, but it saves us from “Hey, why does this shelf bend in the middle?” emails.
Our PromeAI inpainting QA pass:
- Zoom to 200–300% Check edges of masks, especially around text, packaging, and architecture lines.
- Straight lines sanity check Are table edges, door frames, window mullions still straight? If not, redo that area with a tighter mask.
- Texture continuity Wood grain, tiles, bricks, do patterns suddenly jump or repeat? Tiny masks with same texture, same direction usually fix this.
- Lighting match Is the new object lit like the rest of the scene? Add same lighting as scene to a re-run if needed.
- Color consistency Compare before/after on another screen if you can. What looks fine on a laptop might pop too hard on a projector.
- Ethics and rights check If we’ve used PromeAI as an object removal AI tool to remove watermarks or logos, we double-check contracts and usage rights. Just because we can edit doesn’t mean we should. Always review PromeAI’s terms of service for proper usage guidelines.
Only after this pass do we export finals for decks or send them back to clients.
We’ve walked through the masking rules and prompt recipes we use daily. Now it’s your turn to test them on your next project. Try PromeAI‘s Erase and Region Edit tools with a real shot from your workflow and see if these techniques cut your cleanup time in half.
Frequently Asked Questions
What is PromeAI erase / replace inpainting and how does it work?
PromeAI erase / replace inpainting is an AI-powered editing workflow for removing or swapping elements inside an image. “Erase” deletes unwanted objects and blends the background, while “Region Edit/Replace” lets you mask a specific area and instruct the AI to generate a new object in that same spot.
When should I use PromeAI Erase vs Region Edit / Replace?
Use Erase when you want fast object removal AI with minimal prompting—cleaning clutter, cables, reflections, or stray logos while preserving the background. Use Region Edit / Replace when you already know what should go there, like swapping furniture, changing product labels, or testing different materials and finishes.
How do I mask correctly in PromeAI inpainting for clean results?
Use smaller brushes for thin objects (cables, edges), medium brushes for logos and people, and large brushes for skies or floors. Slightly overlap the object, round mask corners, and lightly feather edges with a softer second pass. More surrounding context usually produces smoother blends and fewer artifacts.
How can I fix halos and color mismatches after using erase / replace inpainting?
For halos, create a tiny mask around just the fringe and re-run Erase with a neutral, texture-matching prompt at slightly lower strength. For color mismatches, reference nearby areas in your prompt (lighting, saturation) and re-inpaint, then finish with quick HSL or Curves tweaks in Photoshop or Figma if needed.
Can PromeAI erase or replace watermarks and logos, and is it legal to do so?
Technically, PromeAI can remove or replace watermarks and logos using Erase or Region Edit, but legality depends on your usage rights and contracts. Removing ownership marks from images you don’t control can violate licenses or terms. Always confirm you have explicit rights before editing branded elements or watermarks.
Recommended Reads
Leave a Reply