You don’t need another week to finalize a concept. You need one focused hour and a solid system. In this post, I’m handing over our internal PromeAI workflowSOP—the exact copy-pasteable guide we use to turn vague ideas into high-quality client deliverables in under 60 minutes.
I’m Millie, and I believe AI isn’t just about magic buttons; it’s about reliable pipelines. We’ll cover everything from the 10-minute brief analysis to the final polish, ensuring you stop churning out random generations and start shipping professional assets that actually get approved.”
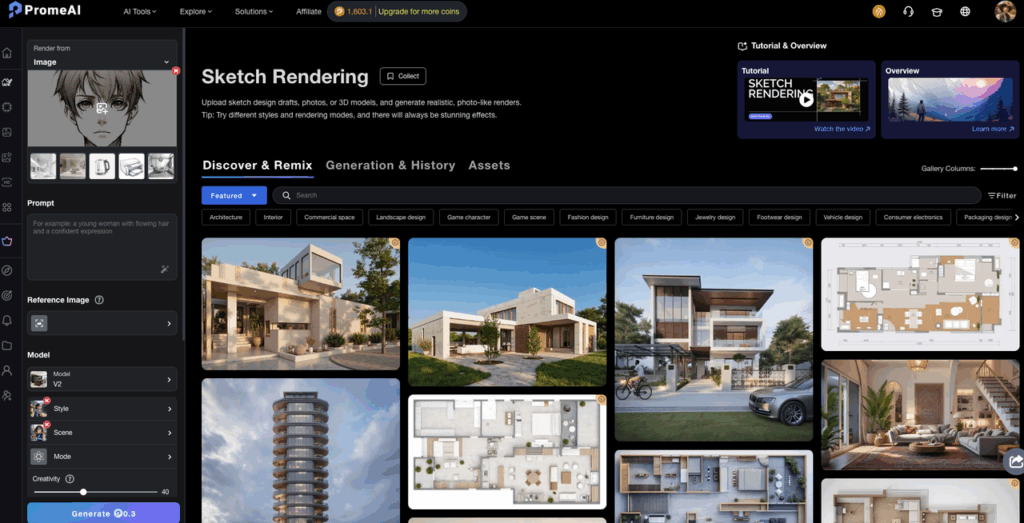
The 60-Minute SOP
We treat PromeAI like a super-fast concept + polish assistant, not a replacement for taste.
Our rule: one hour, one clear output package. If it’s not “deliverable-ready” by minute 60, we pause and reset scope instead of pushing junk.
0-10 min: Brief analysis
This is where most people skip…and then pay for it later.
We spend 10 minutes getting painfully clear on three things:
- What’s the deliverable? (Hero image? 3 concepts? A set of variations?)
- What does “approved” look like? (Brand match? Material realism? Layout?)
- What’s the single biggest risk? (Hands? Text? Perspective? Lighting?)
Then we write a mini-brief we can paste into prompts.
Our mini-brief template (copy/paste):
- Audience:
- Brand vibe (3 adjectives):
- Must-include:
- Must-avoid:
- Output format:
- Deadline + rounds of feedback:
10-25 min: Initial generation
Now we generate fast, but with guardrails.
We start with 3 directions, not 12. More options sounds helpful, but it often creates decision paralysis and adds time to the template process.
What we do in PromeAI:
- Choose one strong base input (sketch, screenshot, rough render, product photo)
- Generate Direction A / B / C with clearly different vibes
- Keep prompts short-ish and specific (like seasoning, too much and it tastes weird)
Prompt structure we use:
- Subject + context
- Materials + lighting
- Camera angle
- Style references (light touch)
- Negative notes (what to avoid)
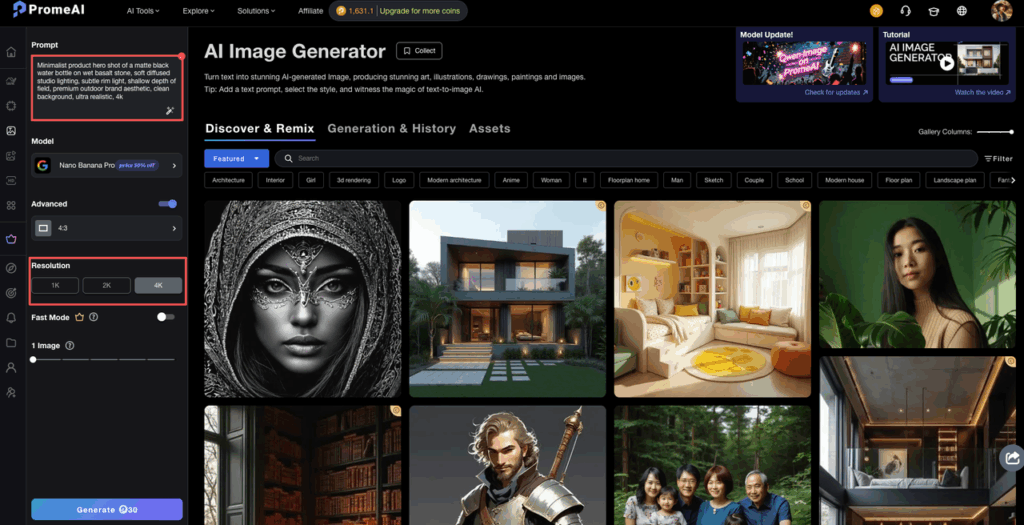
Example prompt (product / marketing visual):
- Prompt: “Minimalist product hero shot of a matte black water bottle on wet basalt stone, soft diffused studio lighting, subtle rim light, shallow depth of field, premium outdoor brand aesthetic, clean background, ultra realistic, 4k”
- Negative: “text, logo distortion, extra cap pieces, warped edges, oversaturated colors”
For more detailed guidance on crafting effective prompts, check out prompt engineering best practices and our PromeAI prompt framework for designers.
25-40 min: Refinement
This is where we stop generating new ideas and start improving the best one.
We pick:
- 1 winner
- 1 backup
Then refine with tight changes:
- lighting consistency
- material realism
- background control
- composition
We keep a simple “change list” (so we don’t wander):
- Fix: (1) perspective (2) material (3) clutter
- Preserve: silhouette, camera angle, mood
If PromeAI gives us something almost-right but with one “ugh” detail (weird edge, warped handle, strange reflections), we don’t throw it out. We regenerate with one constraint changed at a time.
If you’re working with product photography specifically, our product photo to studio shot tutorial shows exactly how to elevate basic product images into professional-grade visuals.

40-55 min: Final polish
This part is boring… and it’s what makes the client say “wow.”
We do a quick polish pass outside PromeAI (usually):
- minor color correction
- sharpening where needed
- clean up artifacts
- add safe margins for layout
And we sanity-check:
- Does it match the brand palette?
- Does it read at thumbnail size?
- Is anything accidentally misleading? (important for product marketing)
55-60 min: Export & delivery
We export in two sizes:
- Client preview (fast to open)
- Production-ready (bigger, cleaner)
And we deliver with a tiny note that reduces revisions:
- “Here are 3 directions. If you pick one, we can do 2 refinement passes focused on lighting + materials.”
That sentence alone saves us from the endless “can we also try…” spiral.
Input Checklist
If we want consistent client deliverables, we need consistent inputs. Here’s our checklist before we touch PromeAI.
Client + project inputs
- One-sentence goal (what this asset needs to do)
- Target audience + placement (web hero, pitch deck, Amazon listing, etc.)
- Brand references (2–5 examples)
- “Do not do this” list (seriously, get it in writing)
Visual inputs
- Best available source image (or sketch / CAD / screenshot)
- Logo files (if needed) in SVG/PNG
- Color palette (HEX or brand guide)
Technical constraints
- Aspect ratio(s): 1:1, 4:5, 16:9, etc.
- Minimum resolution
- File type requirements
Privacy note (quick but real): Before uploading client assets, we check the client’s policy and our contract. If the work is sensitive, we either use sanitized inputs or get written approval. (AI tools vary in how they handle data, always read the vendor’s terms.)
If you’re building a repeatable template process, this checklist becomes your intake form. No intake, no generation. That’s the rule.
Tool Sequence
Here’s the simple sequence that keeps our promeai workflow from turning into chaos.
Our usual stack (in order):
- Brief doc (Google Doc / Notion), define “approved”
- PromeAI, generate + refine concepts fast
- Photoshop / Affinity / Figma, cleanup, layout, and final export
- Delivery folder (Drive/Dropbox), clean naming + versioning
Why this order works:
- PromeAI is great at exploring looks quickly.
- Figma/PS is where we lock the design system details.
- The folder structure is what prevents “Which file is final_FINAL_v7?”
We also keep a tiny prompt library.
Prompt library fields (so it’s reusable):
- Model: (whatever we used last time)
- Prompt:
- Negative:
- Seed: (if the tool allows it)
- Notes: what worked / what broke
When we save Prompt + Seed together, we can reproduce a direction later without guessing. That’s the difference between a fun experiment and a professional design SOP.
For 3D designers working with Blender, there’s also a PromeAI Blender integration that can streamline your rendering workflow even further.
Revision Loop Protocol
The revision loop is where timelines go to die. So we run it like a protocol, not a vibe.
Our rule: one request = one change batch.
We ask clients to respond in this format:
- Pick a direction: A / B / C
- Rate it: 1–10
- Change requests (max 3 bullets)
- Anything to preserve (1 bullet)
We run revisions in two rounds:
- Round 1: big rocks (composition, lighting, materials)
- Round 2: small polish (cleanup, color, consistency)
If feedback arrives as a paragraph, we translate it into “actions” and confirm:
- “Got it, so we’re keeping the camera angle, reducing gloss, and simplifying the background. Correct?”
That one message prevents the sneaky third interpretation that triggers extra work.
Also: if they ask for “five more options,” we offer a trade:
- “We can do five new directions, or we can refine this one into a final-ready hero. Which matters more?”
It keeps the client deliverables aligned with the deadline instead of becoming a never-ending mood board.
Delivery Specs
We deliver like we expect someone else to pick up the files next week (because they will).
Folder structure (simple, consistent):
- 01_Brief
- 02_Working
- 03_Review
- 04_Final
File naming:
- Client_Project_Asset_Direction_V01
- Client_Project_Asset_Direction_V02
What goes in the Final folder:
- Final PNG/JPG (client preview)
- High-res version (production)
- A 1-page “notes” doc: what changed + what’s approved
Export defaults we use (marketing visuals):
- Web: 2000–3000px on the long edge, JPG high quality
- Print-ish: PNG or TIFF, higher resolution as needed
- Color: sRGB unless the client requests otherwise
If the deliverable is for ads or ecommerce, we also include safe crops:
- 1:1, 4:5, 16:9
This is the boring part that makes you look insanely professional.
Full Example with Timestamps
Here’s a real “we need this fast” example from a recent sprint.
Scenario: product designer + marketer need 3 hero concepts for a landing page. One product photo provided. Brand vibe: clean, outdoorsy, premium.
00:00–00:10 Brief analysis
- Must-include: bottle silhouette, matte finish
- Must-avoid: fake logos, unreadable text, surreal props
- Output: 3 directions + 1 refined winner
00:10–00:25 Initial generation (3 directions)
- Direction A: “basalt + mist + premium outdoors”
- Direction B: “bright studio, minimal, white backdrop”
- Direction C: “lifestyle counter shot, morning light”
We saved:
- Prompt: (per direction)
- Negative: “text, warped cap, extra parts, plastic shine”
- Seed: we logged it (if available) so the look is repeatable
00:25–00:40 Refinement (pick A as winner) We tightened:
- lighting: softened highlights
- material: reduced gloss to match “matte”
- background: removed clutter that competed with the product
00:40–00:55 Final polish (PS/Figma)
- cleaned edge artifacts around the silhouette
- adjusted contrast so it reads on mobile
- added safe margin for headline placement
00:55–01:00 Export & delivery
- Exported A (final) + B/C (concepts)
- Dropped into /04_Final with clear naming
- Sent note: “Choose direction A/B/C. If A, we’ll do one more pass focused on background simplicity + headline legibility.”
That last line reduced feedback to two bullets instead of 12.
If we’re being honest: PromeAI wasn’t perfect on the first try. We had two generations where the bottle edge got slightly weird. But because we had a tight change list, we fixed it without losing 20 minutes.
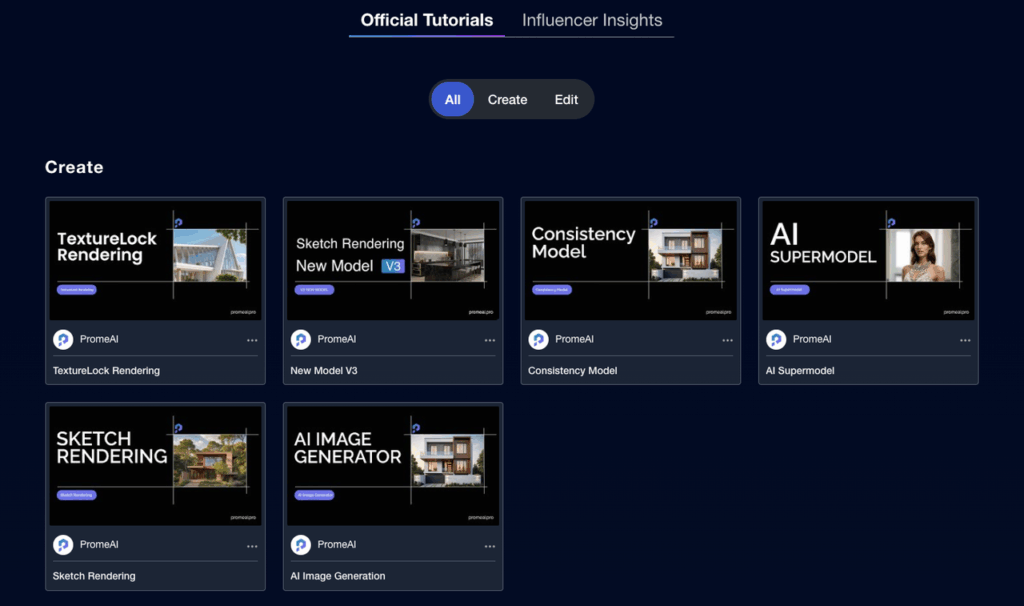
For more step-by-step workflows and visual examples, explore the PromeAI Academy tutorials section.
Quick question for you (so we can steal, uh, learn, your best trick): where do you usually get stuck in your PromeAI workflow, inputs, prompt wording, or the revision loop with clients?
We’ve mapped out the exact pipeline. Now, take this SOP and test it against your next actual deadline. Start your focused session with PromeAI and see the difference in delivery speed.
Frequently Asked Questions (FAQ)
What is a PromeAI workflow SOP for client deliverables?
A PromeAI workflow SOP is a repeatable, time-boxed process for turning a rough idea into client-ready visuals fast. In this approach, PromeAI handles rapid concept generation and refinement, while tools like Photoshop/Figma handle cleanup, layout, and export so the final package is deliverable-ready.
How do you create polished client deliverables in 60 minutes with PromeAI?
Follow a tight 60-minute SOP: 0–10 minutes clarify deliverable, approval criteria, and risks; 10–25 generate three distinct directions; 25–40 refine one winner plus a backup; 40–55 polish externally (color, artifacts, margins); 55–60 export preview + production files with a revision-guiding note.
Why does the PromeAI workflow recommend three directions instead of many options?
Three directions keep decision-making fast and prevent option overload. Generating 10–12 variations can create client paralysis, more comparisons, and longer revision cycles. With three clearly different “A/B/C” directions, feedback becomes more decisive, and you can move quickly into refining a single winner for final deliverables.
What should be included in an intake checklist to keep PromeAI client deliverables consistent?
Use consistent inputs: a one-sentence goal, audience and placement, 2–5 brand references, and a written “must-avoid” list. Add the best source image (photo/sketch/CAD), logo files if needed, palette/brand guide, and technical constraints like aspect ratios, minimum resolution, and file types.
How do you prevent endless revision loops when using a PromeAI workflowSOP?
Run revisions as a protocol: one request equals one change batch. Ask clients to pick A/B/C, rate it 1–10, give max three change bullets, and one “preserve” bullet. Do two rounds only—Round 1 big rocks (lighting/materials/composition), Round 2 polish—then confirm actions before executing.
Recommended Reads
Leave a Reply